The Scriptorium is my work journal; a place for show and tell.

Thursday
Aug122010

My Favorite Things: My "Eraser Station"

Here's my 'erase and correct' station.  I thought I'd share a picture while it is still neat and tidy after yesterday's spill clean-up.

This is one of my favorite banker's wells.  It's got great nooks and crannies for supplies.  As you can see, I've got quite an assortment of erasers at hand--some erasers work better on some papers than others, don't you think?  I also have an exacto knife--some papers will allow a gently scraping to remove ink, a tiny little brush for sweeping away the erasure crumbs, and a water filled brush.  Sometimes scraping and erasing can lift the fibers of some papers, and I've found that gently brushing over the spot with a damp brush and then laying another piece of paper over it while it's still damp and pressing down will lay those fibers right down.  Well, sometimes it works.  

Did you notice that I used the words 'some' and 'sometimes' a lot?  That's because nothing works every time.

Do you have any tricks for correcting mistakes and erasing errors?  If so, I'd love to hear about your techniques.

Wednesday
Aug112010

Three and a half hours. . .

. . . many gallons of water, two bottles of windex, and 4or 5 rolls of paper towel later. . .

A CAUTIONARY TALE

So this morning I reached for a new, fresh bottle of Liquitex acrylic ink and, OH! NO!--the lid came off in my hand, the bottle fell from the drawing board and onto the carpet.

How could I allow such a dumb thing to happen, you ask? 

Laziness. 

I wanted to test the new color against the greens I already had.  What I SHOULD have done is put a dropper-ful into a dappen dish, dip the pen, make a couple of lines, then suck the rest of the ink back up in the dropper and clean the pen and dappen dish.  Instead, thinking to avoid cleaning the dappen dish (I mean really--how hard is it to clean a dappen dish??) I held the nib over the bottle and touched the end of the dropper to the nib, put the lid on top of the bottle, made my marks, cleaned my pen and promptly forgot about screwing the lid down tight.

Sigh. . .accidents happen.  I can usually just roll with a true accident but this?  I was SO MAD at myself.

Here's what's left of the stain:

Now I've got a least an hour's worth of work to put my studio back together (everything had to be taken off the top of the desk and the lighted drawing board disassembled because ink got all over it and underneath the glass).

The good news?  None of my work was touched.  Not a drip or a drop.

So, who else has spilled copious amounts of ink onto carpet?  How did you get the stain out?  (Or DID you ever get the stain out?)

Tuesday
Aug102010

Quote: Albrecht Durer

`How often do I see great art in my sleep, but on waking cannot recall it; as soon as I awake, my memory forgets it.'   Albrecht Durer

Me?  I see a great join with an ampersand when I'm in the shower but I by the time I'm dressed and back to my drawing board, my memory forgets it. . .


I've been trying to incorporate a heart shaped ampersand into the heading of a seating chart and even though I did 'see' it, it still eludes me.


Sigh. . .

Tuesday
Aug102010

Excellent Resource: Design *Sponge

I've been reading Design *Sponge for a few months now.  It's not directly related to calligraphy but it is a wealth of visual inspiration and design.

Today Grace uploaded a video she made about how to stay focused and productive.  I thought about going and grabbing the YouTube URL but instead I'll share the link to the post so you can watch the video there and then while you are there you can go feast on images and ideas.

Seriously good stuff.

I'm off now to check out The Pomodoro Technique Grace mentioned on the video. . .

Tuesday
Aug102010

Tips and Tricks: Nib Size reference 

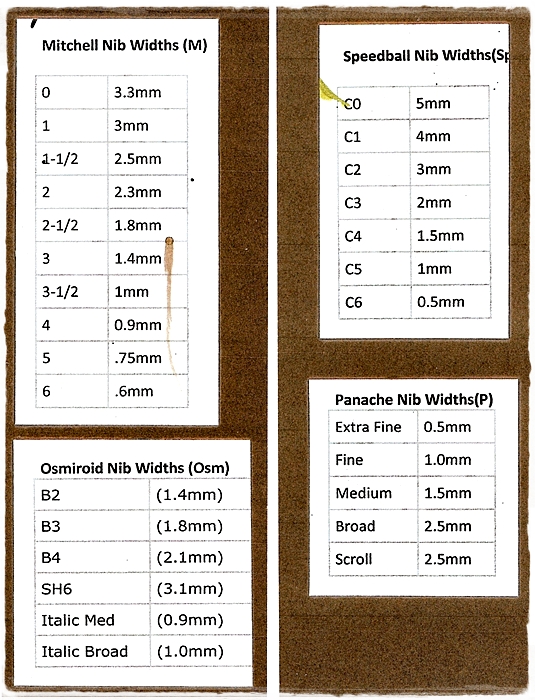
Here's a little tool I made for myself as a reference when I'm making guide sheets:

What you see is the front and back of the original single, bookmark-sized reference list.  It was getting a bit messy so I mounted it and laminated it so it would hold up better and be easier to find in the paper explosion that is my drawing board.

Monday
Aug092010

Quote: Edward Johnston

". . .straightforward, undesigned work is often the best.  The student is apt to waste time writing out an elaborate draft in order to ascertain how to space the matter.  This is a mistake, because if written well, it is a waste of good writing on a mere draft; it written ill, it is bad practice.  The briefer experiments and calculations are, the better. . .practice will make people very good guessers, and the best work of all is done when the worker guesses rightly, and follows his guesses with the actual work, itself the trial and proof of accuracy."

Edward Johnston, Writing, Illuminating, and Lettering

I'll be thinking of this advice from Johnston as I start work on a seating chart tomorrow. . .

Saturday
Aug072010

Vintage pens

My friend, Carol, gave me these beautiful vintage pens.

The one on the left above is shown below.  It has "Forget Me Not" inscribed on the nib:

Here you can see the bottom and a bit more of the inscription that wraps around the nib:

I love the floral pattern on this one:

This one is some sort of cartridge pen, I think, but I can't get it open:

Friday
Aug062010

Homemade Portable Light Box

Necessity, they say, is the mother of invention.

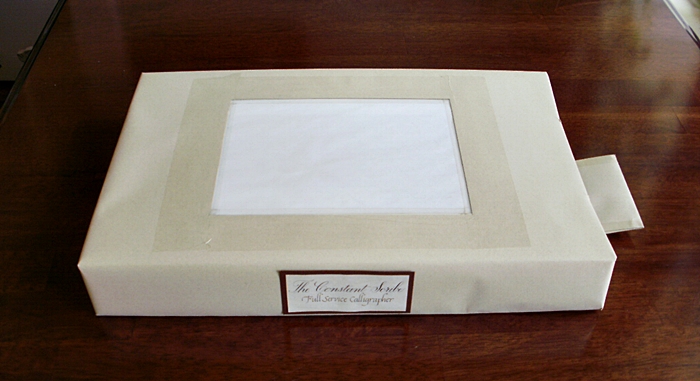
Many, many years ago I made this light box out of an old shirt box out of necessity.  I had promised to scribe some bookmarks at a church Family Fun Fair but my lighted drawing board was too big and bulky to take along. My little box wasn't very attractive (I think it said Kohl's across the top) but it worked great.  I've used it off and on and it's proven to be pretty sturdy.

Last spring, I wanted to use it at a Bridal Fair, but it looked pretty beat up, so I covered it with paper and slapped a logo on the front.

In hind sight, I wish I had taken photos of it before I covered it but hopefully, with the photos, you'll be able to see how I did it and maybe make one for yourself!

To get started you'll need a standard shirt box, an 8 x 10" piece of glass, duct tape, scissors, exacto knife, a ruler, and an 18" under-the-counter fluorescent light fixture.

Working with the top box lid facing down, draw diagonal lines from corner to corner on the inside of the box lid to find the center.  Using those lines as a guide, lay the glass down on the inside of the box top, center it, and trace around it.  Set the glass aside.  Now, using the ruler, make a rectangle inside the one you just traced, measuring 1/2 inch in on all sides.  Laying the shirt box top on a surface safe to cut on, cut out the inner rectangle using a ruler and exacto knife (or you could use a rolling cutter).  You'll need to cut a piece of translucent paper the same size as your glass and tape it securely to the glass.  Now, lay the glass back down where you centered it, (glass side down, paper side up) and secure with duct tape.  Flip the lid over and using clear tape, tape around the opening, securing the lid to the glass from the outside.
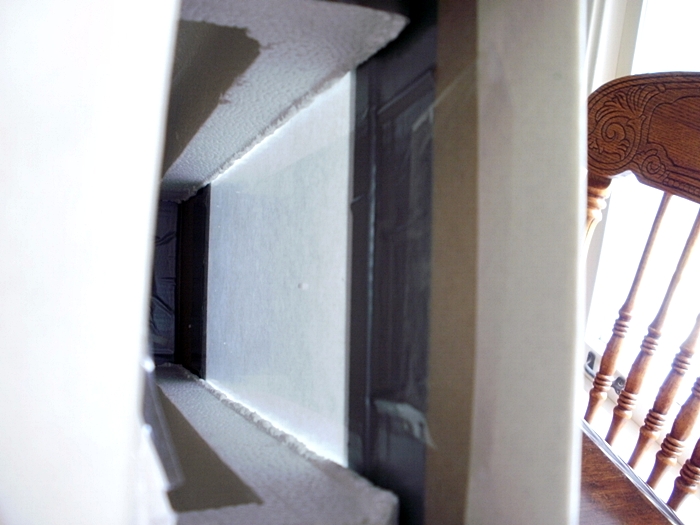
 

Peeking inside mine, you can see the glass taped to the lid with duct tape.
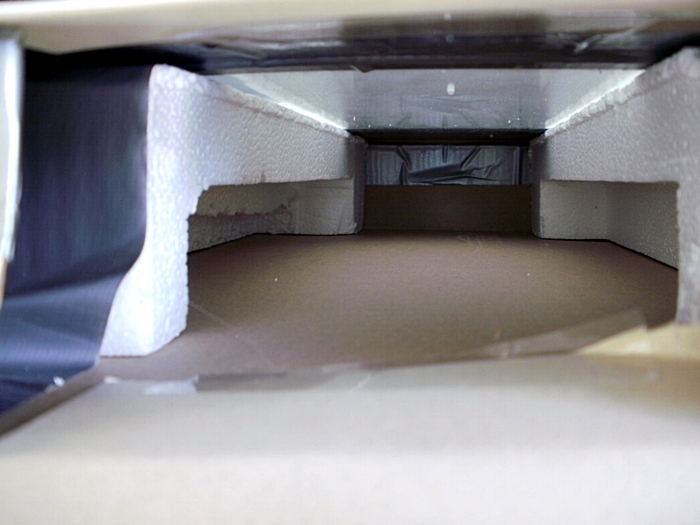
Next, trim some sturdy pieces of styrofoam to run the length of the inside of the box.  If you're lucky, like me, you'll find some that will work without too much trimming.  You'll want them big enough to support the sides of the glass.  Tape them into place securely with duct tape.
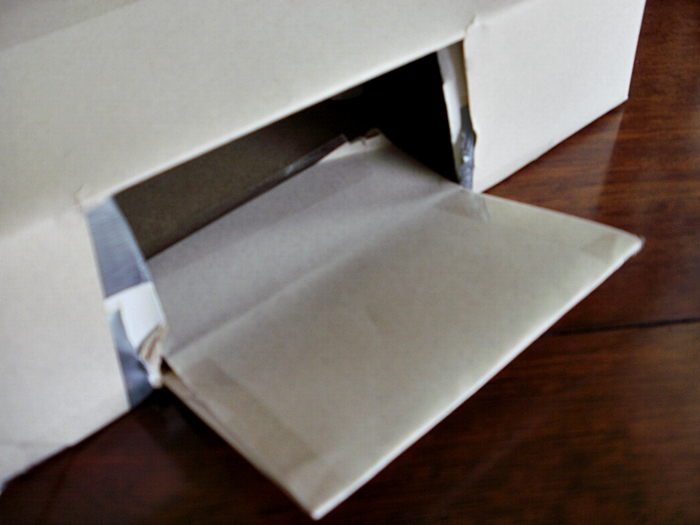
Now, put the lid on top of the bottom and cut a hole in the side all the way through the lid and the side of the box, big enough to slip in your light fixture.  I left a flap but I don't know why.  You don't really need one!  Tape the lid of the box and bottom together.
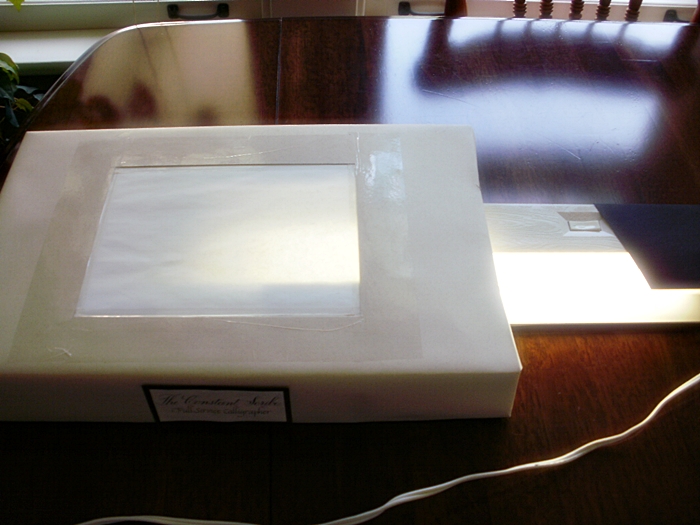
Put your light fixture in the side, plug it in, and you're ready to go!
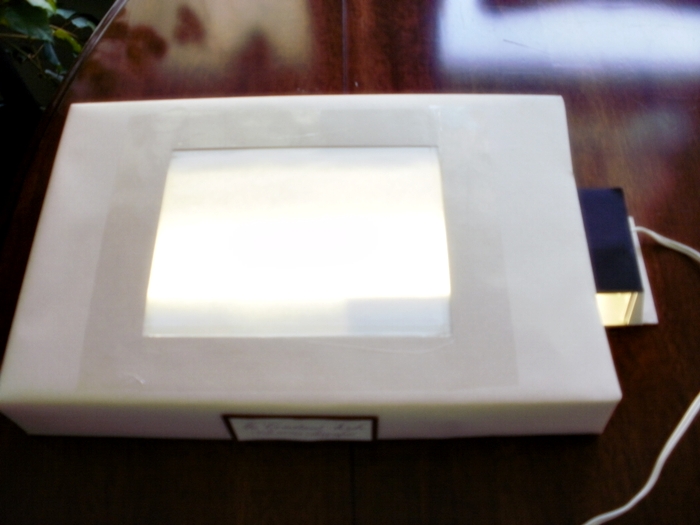
Clear as mud, right?  If you decide to make one and you have problems or questions, just let me know and I'll try to help!  If you do make one, send me a picture and I'll add it to this post!

Thursday
Aug052010

Nib Storage

This is an easy way to store nibs.  Just measure the depth and length of your wooden box, then cut pieces of corrogated cardboard to size and line them up one after another until the space is completely filled.  It's easy to cut the cardboard with a quilters ruler and an exacto knife.  The labels are be made of slightly taller paper and the nibs slip right into the curvy spaces created in the cardboard.

Instead of sifting through tins, finding the right nib is now just a glance away. . .

Wednesday
Aug042010

My Favorite Things: Vintage Bankers Ink Bottle Holder

When I've been out poking around in antique stores, I always keep my eye out for vintage ink wells and Bankers desk sets and if the price is right, I snatch them up.  I have four now, but this one really IS my favorite.  The opening is big enough to hold a jar of walnut ink and there are two pen rests.  This one is marked Sengbush No. 300 on the bottom.

Someday I'll show you the other three.  I do keep them all on my desk for various uses.  They make me happy.